Sunday, October 23, 2011

Sourdough Breads


This week, we're going to make bread the old-fashioned way - the VERY old-fashioned way. We'll start off a new batch of yeast using flour and water. This is commonly called a starter and I may also call it a culture, as this is what a little colony of microbes is often called.

Whether or not they'd like to admit it, everyone has some experience with yeast. Yeast is in almost every bread that you've ever eaten. If it's not, you wind up with a flat bread or cracker. Some breads can also be risen with baking powder, but I'll write about that another time.

We'll create our starter this week and then someone will need to watch it closely, making sure that it gets fed every day so that it is ready for us by next week. It won't be superstrong at first, but will become much better and more flavorful as we work with it. In fact, we will maintain a culture throughout the whole year and I guarantee that it will be very popular with the teachers at our school.

Tuesday, June 14, 2011

Experiments at Home: Sourdough

I have been having a heck of a time getting the no-knead bread to work out: it's been a mess. The trouble I think I am having is that it kind of breaks every rule about bread making that I know. I've had so many disappointments lately that I broke down and made a nice loaf of maple whole wheat bread the way I know already.

"It's really pretty," my wife said. "It tastes really good."

Then I realized that I've been with my wife for 8 years and I've never made her bread. I used to make it almost daily. Oops.

In any case, the bread was perfect and reminded me that I knew what I was doing, so I decided to tackle Sourdough. Then I realized that sourdough goes thru a very similar process as the no-knead bread: mix ingredients, then let sit for 12-15 hours, then mix again and let sit for 2-5 hours (depending on the rise). Then bake in a large cast iron pot.

Argh. The Same process. It's really annoying because all of the websites I have been reading (and I've been reading about 6 of them) talk about how easy it is to make bread like this. I could kill them with my giant, heavy, cast iron pot.

This time, I want to get it right, but I think I've mixed the dough too dry already. It doesn't look anywhere near as goopy as the ones I see online.

Saturday, June 4, 2011

Experiments at Home: Sourdough Starter


I decided to make my own sourdough starter and I'm trying 2 different methods, one with whole wheat and one with white flour. I want to see what the difference is.

When I've tried this in the past, I've wound up with moldy puddles of goo or I didn't understand what was going on & I gave up on it.

Whole wheat is a bit harder to start, so I began my mix with orange juice, which gives some sugar and some acid, both make yeasts very happy.

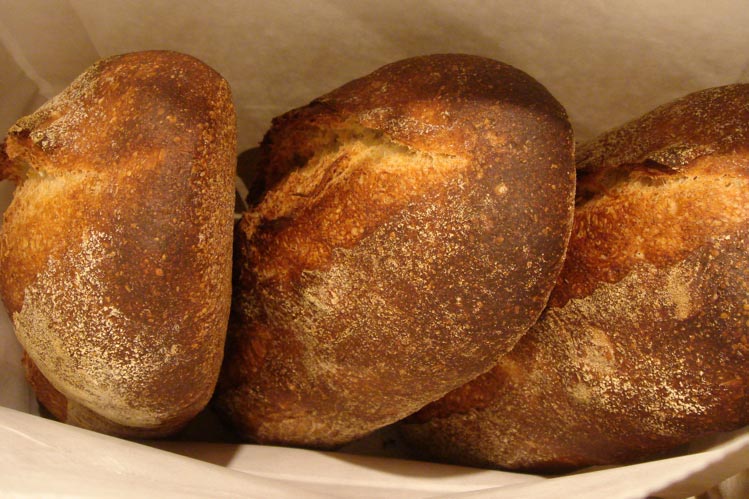
Why sourdough? Sourdough is tasty. I love the bread. Also, it's the way that risen (leavened) bread has been made for hundreds or thousands of years, maybe. I want to be able to figure it out and make it.

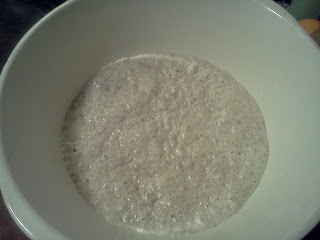
What is sourdough? Sourdough is alive! Firstly, this is just the starter, which is important. A sourdough starter is a bunch of wild yeast that has been gathered together, given food (flour) and water and let thrive. Once they're happily thriving, all you have to do is keep giving them food and the colony will live forever. There are sourdoughs that are hundreds of years old and their flavor gets more & more complex. Mine is a first generation - I am not sure how tasty it will be.

To make sourdough starter:
Get a container - glass or ceramic is best.
Into this container, add:
  • 1/2 cup water
  • 1 cup flour
That's it! Mix them together and let it sit out with a paper towel over the top. The next day, dump out half of the mix and add in more flour and water. Keep the proportions the same.

It will take several days for the colony to get strong enough to really be noticeable, but keep it up. If it's not getting moldy, it's working.

Contrary to popular belief, sourdough yeast are not captured from the air, but from the wheat itself and possibly from our hands. All of these little microorganisms live together with the wheat. Given the right situation, they thrive and can help us make tasty bread.

I am going to let these sourdough yeasts develop a colony for the next month or so, feeding them every day, and then try to make my first sourdough bread from my own starter.


Some common problems:
Q. There is liquid on top & it looks dead.
A. It's not dead - mix in the liquid (it's hooch, but don't drink it!), dump out half and add more flour and water to the mix.

Q. Nothing is happening.
A. It may be quiet for several days before you start noticing bubbles forming within the starter. Once bubbles are forming, you know the yeast are there and getting stronger.

Q. I can't see any bubbles!
A. Your starter may be really thin - if you have a liquidy starter, the gasses will just bubble away!

Q. It's been a few weeks and I am sick of feeding this thing every day.
A. It should be in good shape by now. Put it into the fridge until you are ready to use it. When you want to make sourdough bread, take it out, feed it and give it a day or so.

Sunday, May 22, 2011

Experiments at Home: No-Knead Bread


So I decided to try the no-knead bread recipe. This dough is sticky stuff! I hope the loaf turns out well. As I write this, I am waiting for the final rise on the bread.

Unlike your traditional loaf of bread, no-knead bread is never kneaded or smooshed around. The prupose of the smooshing is to lengthen the gluten strands within the dough so they will heal back together, make longer gluten strands and a better rising, stronger bread.

The idea behind no-knead bread is that if the dough is given enough time to sit, then gluten strands will do that chemically, not physically by being smooshed and broken (kneaded). It just takes longer.


This is my first try & this is the dough after having sat for 20 hours.


You goop the very wet dough out of the bowl (I had to use a rubber spatula to help shape it) and onto a well-floured surface. Then I "shaped" the dough, which just kinda blobbed around and put it inside of a dutch oven lined with a floured cloth inside. This way, the bread will appear nice & "rustic," just like my friend in France had been making. Maybe...


We'll see how it looks in another hour. Right now, it looks like a puddle in a pan.

Friday, April 22, 2011

Experiments at Home: Sauerkraut


Real Sauerkraut is different than the type you'll buy in most stores and the recipe is simple as heck:
  • cabbage
  • salt
  • water
The real added ingredients are microbes in the air & on the cabbage and time.
  1. Slice cabbage very thin with knife or food processor.
  2. Scrunch up with some salt until the cabbage starts shedding some of its juice.
  3. Smoosh the cabbage into mason jars or a large crock
  4. Keep cabbage under the liquid so no air can get to it

It will be ready to eat in 2 weeks and gets better with age.

This is also the way that they make kosher dill pickles, but this is, as my wife says, some "pretty funky stuff." I love it.


Monday, April 11, 2011

Experiments at home: Live Foods

For the past few years, I've been kind of amazed by live foods & yeasts. If you've ever had a kosher dill pickle or yogurt, you've had a live food. That same acidophillus that everyone says is so good in yogurt is available all over the place (it's on you right now!). A lot of cheese is also very much alive and it's the aging that allows these microorganisms to thrive in whatever food we're eating.

It's a very good thing.

Our body is loaded with tons of these little microbes, inside and out. We can't really digest food without them. By adding in other foods with these organisms already in them, we are making our digestion work better and being healthier. It's pretty amazing really.

What this looks like is a bunch of jars on my counter being left out for weeks on end. Instead of going bad, the bacteria help to preserve the food! It's been done this way for centuries in cultures all over the planet.